Today i'm going to show you how to use a two-part spray foam insulation package. There'S a lot of different manufacturers of these packages, so just depend of what's available in your area, even though I'm going to show you how to use this particular one make sure you for sure read all the safety instructions and the user manual in whatever package you Get just to be sure that in case there's, any differences from manufacturer to manufacturer, so the one we have today is a what they call a two hundred kit. So what they're saying is that the yield on it will be about two hundred square feet worth of foam at one inch thick, so we're gonna be spraying close to two inches thick here, so we'll be hopefully getting around 100 square feet out of these two Cans at two inches thick, so once I opened up the box, some of the first things you find is you're gonna find the instruction manual as well as the you know: safety equipment, that's needed and all of the little tips and that sort of thing so Make sure you read that over well, most of these guys have 1-800 numbers and websites as well. So if you have other questions, you can get ahold of somebody to ask. You should find an assortment of some different spray Nozzles.
These guys send two different types and they've sent about. I don't know four or five of each one. It looks like so this
particular nozzle here is just for spraying. You know gaps and cracks sort of thing. It'S
gon na send out a stream, so that would be that one here this one here is a fan tip. It'S got a bit of a v-notch cut
in the end, so this one's gonna spray out about
a I don't know it just depends on the kit you're using but probably eight-inch
or so fan width of the
pattern, which is good for filling wall. Cavities, like what we're gonna do here, so you'll have a bit of a selection of the tips in there. This kit comes with two two containers: two two steel cylinders. This
particular one already has the hoses and the gun already hooked to it. That
does have a bit of a carrying handle here
as well.
Some of the bigger kits they're gonna have tanks to teach in tanks, obviously because it's two components, but the tanks are much larger, so they come boxed separately just because they're too heavy to to carry is one unit. So in here, like I said this, one, the gun and the hoses
are already attached to the tanks. Some of them you will, it will come with a wrench and you may have to attach your own hoses and gun a couple things to go over. I guess, since I've got the gun out putting on the tips, the gun has a bit of a safety trigger here this one. So the yellow button down here has to
be compressed or pressed before you can
actually squeeze the trigger. The tanks are still turned off
by the way, so you don't want to turn them on until you're
actually ready to spray. So this gun has a safety on it to attach a nozzle just get. It orientated wait right, there's, usually some marks in the end of the gun that correspond to
the the way the nozzle looks and just push it in there on this one, this little lever here, you should just hear it click in like that and just look to Make sure that the little
believer hook down on the lock knob on the top of the nozzle so putting the nozzle on just like that, taking it off squeeze this button, pull it off when you're spraying? If you stop, for more than about thirty seconds, you're, probably
gon na find that
you'll have to change your nozzle. So it's a good idea, get yourself all set up, get things out of the way, so that, once you
start spraying, you can just kind of keep going with it and you aren't losing a bunch of time. Otherwise, you're
gon na have to change your nozzles. What happens is the two components come in each come in their own
hose and once they hit the
nozzle there's a
kind of a spiral II set up inside of the nozzle here that
actually starts to mix the two homes, because until the two products mixed
together, They don't
actually have the chemical reaction which causes them to expand and cure. So if you stop for too long, it
starts to set up in here and it clogs, and it's not
gon na work properly. So that's why they send you multiple ones. So if you stop pop your tip off, put a new one on and away you go again, they also in this bag sent some petroleum jelly. So what they'd like you to do is smear
some of the jelly right inside of the gun here and that just helps to allow your
your tips not to seal up rate at the end of the gun. So you can just throw your tip way put anyone on and everything should be fine, so we've got the jelly optimally. Your tanks need to be around are usually about 24 degrees Celsius around so that'd be what I don't know about 79 78 degrees Fahrenheit to get the most yield out of them and to make everything work properly, so keep them somewhere stored. Warm you can spray on to a cooler surface, but you don't want something. That'S frosty and wet so like here where we're doing this in February and it's a below grade. So the wall is cool, but it's actually still about 2 degrees Celsius. So and there's no frost present, so that's your tanks once we're ready to go we're
gon na open, both valves on the tanks completely you're
gon na see the product
start to come down the line once
once. It fills up the lines. Oh before that, sorry,
you should shake the tanks really well. I think it's usually around 3040 seconds. You need to agitate the tanks that will just get things mixed
together, open your valves, let it bleed into the lines. Do your petroleum jelly, get your tip, ready and
and then you're pretty much close to being ready to spray, and obviously, before that, put on all your
your protective equipment protective equipment? These guys recommend, if you don't have
real good ventilation, that you should
be wearing a respirator similar to this and it's fitted with cartridges
that are for organic vapor
as well as particle filtration, so they're
kind of a two-part cannister one. Does the organic part of the chemicals and the other just does
the any solids that might be in the air? So so it's important to have that if you don't have the proper ventilation, we did a did. A video with us with a similar product there a while ago, and we had
a lot of people freaking out because we weren't wearing a mask. We
did talk in the video, how we had lots of ventilation and everything, but we still had people kind of freaking out, so we've
actually gon na redo this video today and we don't have the ventilation here
quite as good. We just
were able to open a couple windows, so we're
gon na use the mask for sure also some rubber gloves to protect your hands. You already see that I have
the the painters suit on or the bodysuit on, to protect my clothing, I'm wearing a hat I'll, have safety glasses on. So it's just to protect yourself from any spray back that you might get. It doesn't happen
very often, but you never know you could get some bounce back onto you so and it doesn't come off that easily. You definitely don't want it in your eyes or your mouth or anything like that. So so that's for the protective part. I think I've I've shaken the tanks,
pretty good, we'll give him another little shake
shake before we go just before. I
actually use a nozzle and once I've got the tanks open, I'm
gon na shoot the gun into a garbage can or a box or in our case, we're
gon na use. A garbage can just to make sure I'm getting two fairly even streams coming out. Then I'll get my tip on and
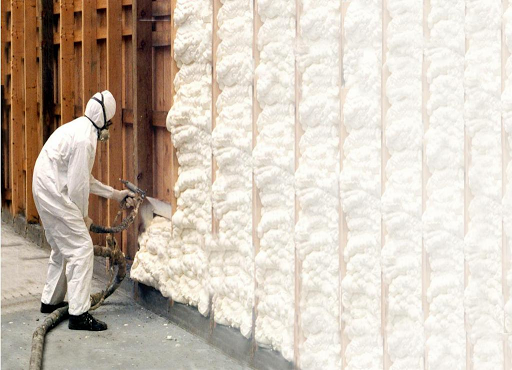
and start spraying, so when you're spraying it's much like kind of in a way
like spraying paint. If you've ever had to do that, we're
gon na come up to the wall. We want to be about six or eight inches away from the wall and we're just
gon na. You know, regulate our speed by hand to put on the amount
that we want to see
get on now. Remember it
's going to expand some, so you don't want to fill the cavity rate up right away or once it expands you're just
gon na be having to cut it all off, because
it's it's sticking out too much. You know. So it's
simply squeeze the trigger regulate. Your speed let go of the trigger squeeze and come down again. Okay, so you just keep doing that. We'Re
gon na do these some of these spaces here in preparation. What we've done any electrical boxes, you'll want to tape them up or seal them up, because once the foam gets in and around them, it'll
actually expand into
the the open holes and cavities of the box and
actually end up inside. So you want to prevent that. So we've just wrapped this one in some plastic, the wiring is fine to
be embedded in the spray foam that isn't a problem. We'Ve just
basically brushed the wall off, made sure it
wasn't covered in any cobwebs and dust and that if the wall is damp or frosty or anything you you want to make sure you warm it up and dry it off before you spray this on that won't Bond to the concrete
as well, you will get some probably
overspray onto some of your framing materials here. We'Ve just got two by twos, but that will clean off with a scraper fairly easily once it secured anything. That'S around the area that you don't want to get foam on, just Paulie it up or tape it off or whatever. Just to be sure you aren't getting some
overspray on anything that you didn't want to cover so we're
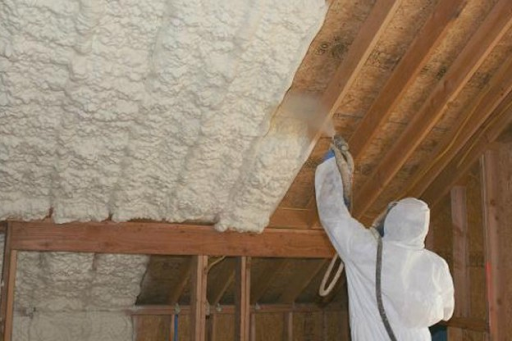
gon na spray. Some rate on this concrete wall, I'm
gon na, go up and do a couple cavities in that wood wall too. It'S
really just the same thing, but I just thought: I'd show it since we can. I think that's
pretty much covering everything that I'd talked about again. Remember just keep your foam canisters at a good temperature.
These ones actually have a little temperature gauge on them. So that's kind of handy to know where you're at but just keep them inside, so they're they're warmed up and good to go. You don't want to directly. You know blast a furnace on them or wrap them in electrical heat blanket or something like that, not nothing that extreme, but just make sure they're warmed up well, okay, so I
'm going to put on my protective equipment. You may not
be able to hear me as well with the mask on so that's why I was trying to cover everything here well before I get all suited up, but I may
may do
bit of talking with the mask on, but it may not be that Clear so so I'm just going to break away here for a minute, get my personal, personal, protective equipment on and then we'll come back and show you how to spray [, Music,
], [, Music,
], [, Music,
], [, Music,
], [, Music,
], [, Music,
] [, Music,
] [, Music,
], [, Music,
], [, Music,
],
[ Applause,
],
[ Applause,
],
[ Applause,
], [, Music,
], [, Music,
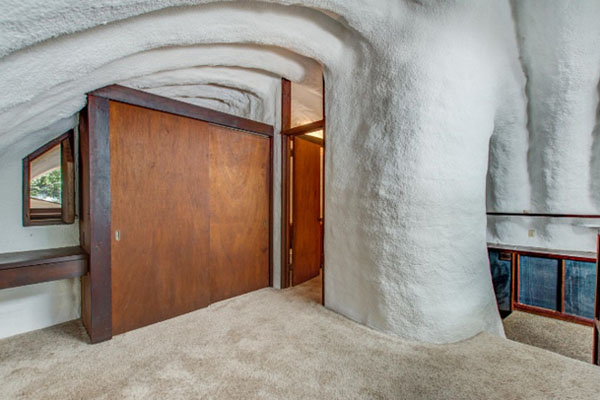
], okay, so we've let things sit here for a
little bit and let the fumes get out. So we can take the mask off and finish up. You can see it's expanded out nicely, it's nice and firm. If you get a wrong mixture, sometimes you'll get a clogged line or something. So if you get too much of one
of the chemicals - and I can't remember - which way it is you'll
actually get soft mushy foam and if it goes, the other way where the other chemical is is too much. The foam is
really brittle in and it almost just doesn't stand up. If you touch it, it
actually crumbles away right away where this is well. This is good. This is nice and firm. That'S exactly what we want so now. The next step
that we're kind of at and some
actually something I didn't mention - was in most areas. If you spray up the two inches, you more than likely will not have to put the poly vapor barrier on the inside, so just check with your local codes. On that, the one thing to consider when doing that, and you notice that I put on two to three different coats like passes, so that those first couple
get a chance to actually cure before you cover them up and form that skin over it, which gives you That that airlock or that air stoppage, because what's
gon na happen now you can see where some of this foam has expanded past the actual framing. So I'm
gon na go back. You know and trim it back flush. So now, if I did had done that all in one pass now that I cut that that probably compromises the vapor barrier, qualities of it where because I've got those couple passes in behind that, I
'm not going to be cutting into.
In my opinion, that's still
pretty good, so in this case we're we're actually only in most in a lot of this we're a little less than an inch and a quarter or inch and a half thick. So we'll we're
gon na need and from my area, we're
gon na need another vapor barrier
anyways, but something to consider so, if you're free, if you're spraying into a 2x4 wall where you've got
the the ability to spray at two or
two and a half inches Thick
go ahead and do it check with your local Building Authority because you may not have to put a vapor barrier over after okay, let's move on so we've got it all sprayed. You can see I'm just taking a utility knife and just shaving this down flush with the studs and just clean it all up peel it off. So you just go around, do all that, because otherwise, if it's sticking out and you go to drywall over top of that,
it's it's gon na give you some issues with pop screws and that
sort of thing. Okay, so just keep going around another thing you can use is the old handy red bar scrape things down, get right, underneath it scrape it off like that once the foam is, is its secured point. This is not hazardous anymore. You can throw this right in the garbage, don't eat it, throw it in the garbage, but you don't you don't need the mask. I don't really even need the gloves on anymore, but just go around. Get things cleaned up so
that it's all good for when you want to put the finishing touches over top of it? What else did I forget anything? I think
that I think that should cover it so now you've seen how to do it. This may not be the most economical way if you're
gon na do a whole basement. These kits aren't aren't real cheap. It might be cheaper
to actually have a pearl come in and give you a price to do the whole thing. If you're in a remote area, though this might be the only option you have, if you're
gon na do
a you know a couple rooms or a
little bit of space, then also again, it might
might still be very economical to do it like this. This stuff works
really good for
joist ends as well so, and we
do have a video on that. So if you want to check that out so yeah, I think that's all. I can tell you so that again, I'm Shannon from house improvements and if you want to go to our website, you can check out the forum. Ask
any questions you might have about this on there and I'll get
get a reply off to you as soon as I can, and also you can check out our YouTube channel and see all the other videos we have thanks for coming and watching.


 mixing than foams it is common practice to use a lower output mixing chamber this will increase the impingement
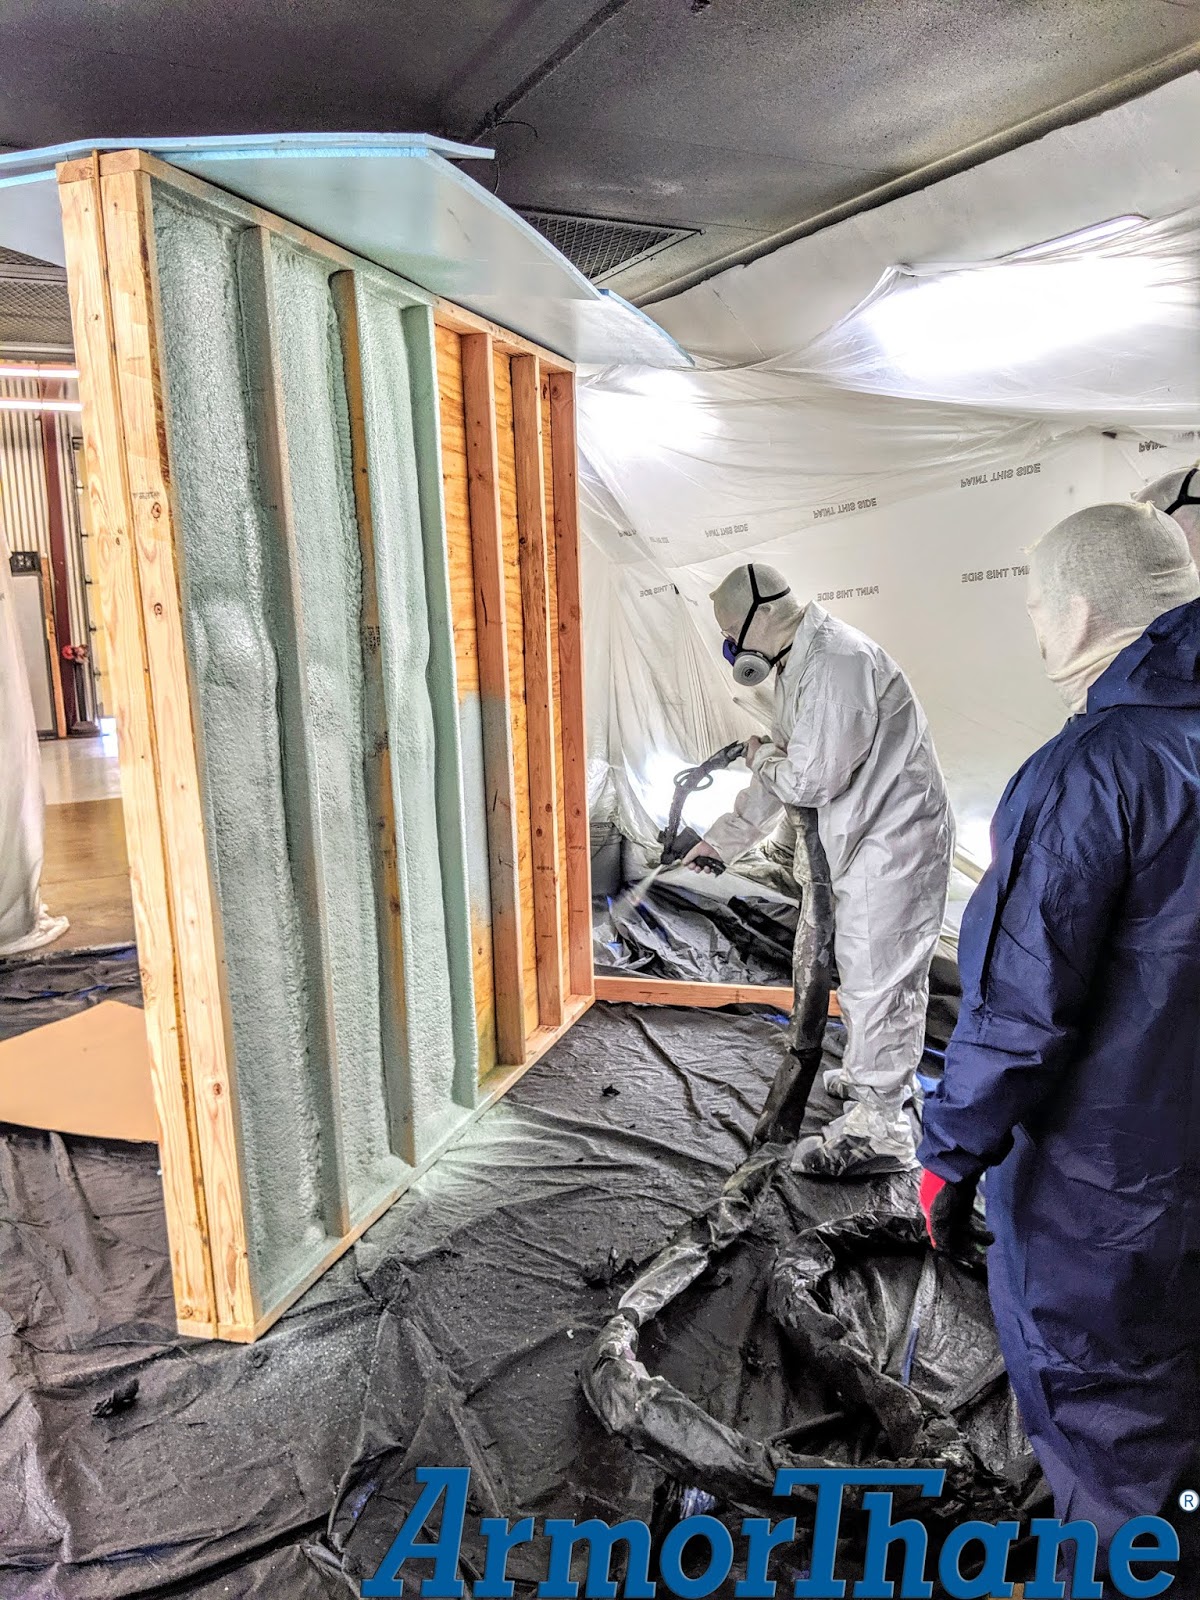


